
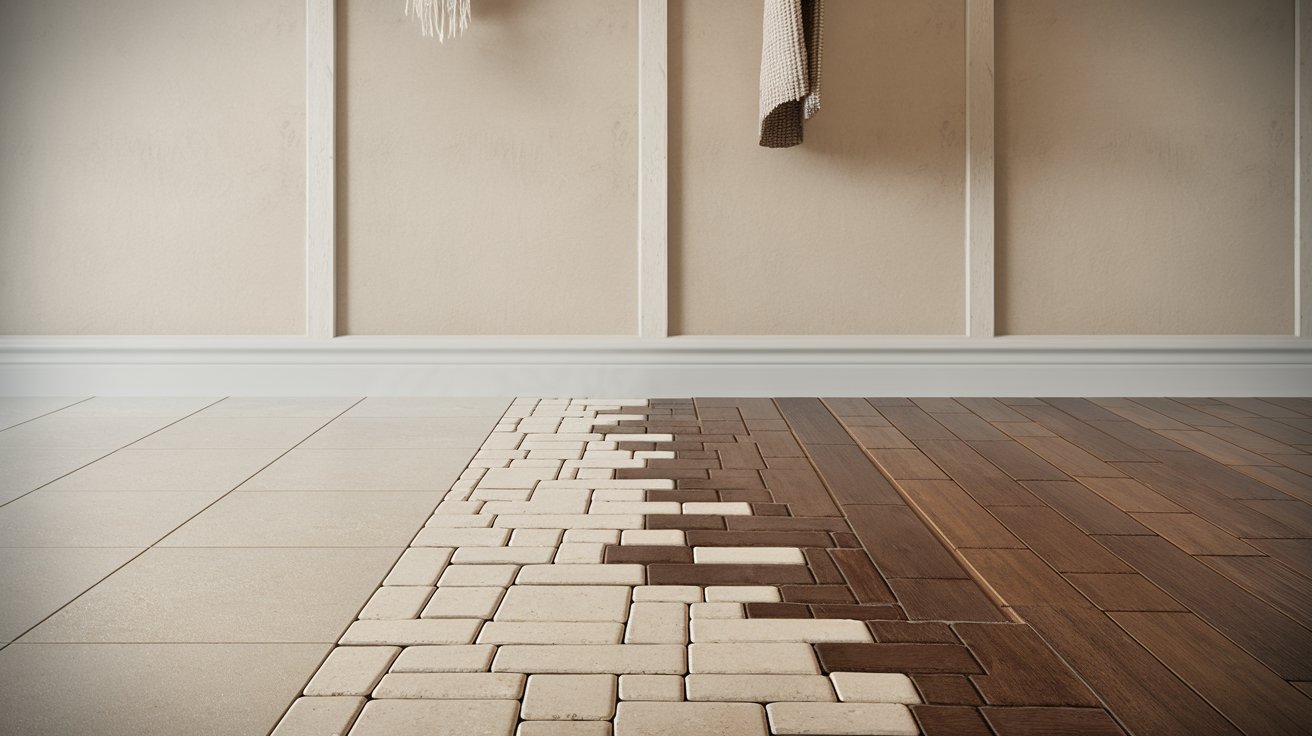
Creating a seamless tile to hardwood transition is essential for modern flooring design in 2026. Whether you’re connecting kitchen tile to living room hardwood or managing bathroom flooring changes, proper transition installation prevents tripping hazards, protects floor edges, and creates visual continuity. This comprehensive guide covers professional techniques, material selection, height difference solutions, and installation methods used by top flooring contractors across the United States.
Understanding Tile to Hardwood Transitions
A tile to hardwood transition serves as the connection point where two different flooring materials meet, typically occurring in doorways, room entrances, or open floor plans. These transitions manage height differences, protect vulnerable floor edges from moisture and damage, and provide aesthetic continuity throughout your home. In 2026, American homeowners spend an average of $150-$400 per transition installation, depending on complexity and materials selected.
The transition strip acts as both a functional and decorative element, accommodating the natural expansion and contraction of wood flooring while preventing tile edges from chipping. Modern transition systems have evolved significantly, with manufacturers like Schluter Systems, Reducer by Armstrong, and Custom Building Products offering solutions for virtually every height differential and design preference. Understanding your specific flooring situation determines which transition method will deliver the best long-term results.
Types of Transition Strips for Tile and Hardwood
Selecting the appropriate transition strip type depends on your height difference, traffic patterns, and aesthetic preferences. Each transition style serves specific functions and works best in particular applications.
T-Molding Transitions for Same-Height Floors
T-molding transitions work perfectly when your tile and hardwood are at equal heights, creating a clean separation line between materials. This transition type features a T-shaped profile that sits in a track between both flooring surfaces, allowing for natural expansion without gaps. T-molding remains the most popular choice for open floor plan transitions in 2026, particularly in contemporary homes where the height difference measures less than 1/8 inch. Installation costs range from $3-$8 per linear foot, with premium wood or metal options reaching $12-$15 per foot.
The T-molding design provides a narrow visual break, typically measuring 1.5 to 2 inches wide, making it ideal for maintaining flow between spaces. Professional installers recommend T-molding for high-traffic areas like kitchen tile to hardwood transitions where durability matters. The track system allows the transition to float, accommodating seasonal wood movement without cracking or separating from either flooring surface.
Reducer Strips for Height Differences
Reducer transitions, also called ramps or transition reducers, specifically address situations where tile sits higher than hardwood or vice versa. These strips feature a gradual slope from the taller surface to the lower one, preventing tripping hazards while protecting both floor edges. Modern reducer strips accommodate height differences from 1/4 inch up to 3/4 inch, with specialized products handling even greater variations. The Schluter tile to hardwood transition systems include several reducer profiles designed for specific height differentials.
In 2026, code compliance for height difference management has become stricter across United States municipalities, with many jurisdictions requiring beveled transitions for differences exceeding 1/4 inch in commercial applications. Residential installations benefit from reducer strips that match your hardwood species, creating a coordinated look while meeting safety standards. Expect to invest $8-$18 per linear foot for quality reducer transitions, with installation adding another $5-$10 per foot depending on complexity.
Schluter Profile Systems
Schluter Systems revolutionized tile transition technology with their profile-based approach, offering metal transition strips that install directly during tile setting. These profiles come in materials including brushed stainless steel, aluminum, brass, and color-coated finishes, providing both functional and decorative solutions. The Schluter-RENO line specifically addresses tile to hardwood applications, with profiles designed for height compensation, edge protection, and movement accommodation.
Professional tile setters prefer Schluter transitions because the profile anchors in the thin-set during tile installation, creating an integrated system that won’t separate or lift over time. The visible portion adds a contemporary metallic accent that complements modern kitchen and bathroom designs. Installation requires precise tile cutting and proper thin-set coverage, making professional installation advisable for optimal results. Material costs run $15-$35 per linear foot, positioning Schluter as a premium transition solution for homeowners prioritizing durability and modern aesthetics.
How to Transition Between Hardwood and Tile
Successfully installing a tile to hardwood transition requires careful planning, precise measurements, and proper material selection. The process varies based on whether you’re working with new construction or retrofit situations.
Measuring and Planning Your Transition
Begin by accurately measuring the height difference between your tile and hardwood at multiple points along the transition line, as subfloor variations can create inconsistent heights. Use a straight edge across both surfaces and measure the gap underneath to determine your exact height differential. Document measurements every 12 inches along the transition, noting any significant variations that might require substrate adjustment. This planning phase determines whether you need T-molding, reducers, or specialized profiles.
Consider the transition location and direction of flooring installation carefully. In open floor plans, transitions typically occur at logical breaking points like where carpet or tile patterns change, under doorways, or at room thresholds. The direction your hardwood runs affects installation complexity, with transitions perpendicular to wood planks requiring different techniques than those running parallel. Professional flooring contractors in 2026 use laser levels to establish consistent transition lines, especially in longer runs exceeding 10 feet.
Installation Methods and Techniques
For track-based transitions, install the track first by securing it to the subfloor with construction adhesive and finish nails, ensuring the track center aligns precisely with your transition line between tile and hardwood. Both flooring materials should end within 1/4 inch of the track center, allowing the transition strip to cover the gap when snapped into place. Apply flexible caulk along substrate contact points before setting the track to prevent moisture infiltration.
Reducer transitions require slightly different techniques, with the reducer strip fastened directly to the subfloor using construction adhesive and color-matched finish nails placed at 16-inch intervals. Pre-drill nail holes to prevent splitting, especially with hardwood reducers. The reducer should overlap the taller flooring by approximately 1/2 inch while the lower edge extends onto the shorter floor by 3/4 inch to 1 inch. For Schluter profile installations, embed the anchoring flange completely in thin-set mortar during tile setting, ensuring no voids exist beneath the profile that could cause movement or noise.
Kitchen Tile to Hardwood Transition Solutions
Kitchen transitions present unique challenges due to moisture exposure, heavy foot traffic, and aesthetic importance in open-concept homes. The kitchen tile to hardwood transition typically occurs where food preparation areas meet dining or living spaces, requiring durable materials that resist water damage while maintaining visual appeal.
Most 2026 kitchen designs favor subtle transition methods that minimize visual interruption between spaces. Flush transitions using matching-height materials eliminate the need for raised strips, creating seamless flow between kitchen tile and adjacent hardwood. When height differences exist, low-profile metal reducers in brushed nickel or oil-rubbed bronze complement kitchen appliance finishes while providing necessary height compensation. Consider positioning the transition under where counter overhangs or islands end, using furniture placement to disguise the flooring change and create natural room divisions.
For waterproofing kitchen transitions, apply flexible silicone caulk along both sides of the transition strip where it meets flooring materials. This prevents water from dishwasher leaks, spills, or mopping from seeping beneath flooring and causing subfloor damage. Premium transition installations include waterproof membrane extensions from the tile area that terminate at the transition line, providing an additional moisture barrier. Professional kitchen remodeling projects in 2026 typically allocate $200-$400 for proper transition installation, including moisture protection measures.
Bathroom Tile to Hardwood Transition Strategies
Bathroom transitions require heightened moisture protection since these areas experience regular water exposure and humidity fluctuations. The bathroom tile to hardwood transition most commonly occurs at doorways, where tile ends and hallway or bedroom hardwood begins, creating a critical barrier against moisture migration.
The standard approach positions bathroom tile slightly higher than adjacent hardwood flooring, typically by 1/4 to 3/8 inch, allowing water to naturally flow back toward bathroom drains rather than into living areas. This intentional height difference requires reducer transitions that accommodate the slope while providing a secure edge seal. Apply waterproof caulk along the transition where it meets bathroom tile, creating a flexible seal that prevents water penetration during shower overflow or toilet leak events.
In 2026, building codes across many United States jurisdictions require moisture barriers extending 6 inches beyond bathroom boundaries, terminating under the transition strip. Professional installations include metal or plastic moisture barriers secured to the subfloor beneath transitions, with the barrier edge sealed with waterproof membrane. For luxury bathroom remodels, consider Schluter-KERDI-BOARD transitions that integrate directly with waterproofing systems, providing comprehensive moisture protection. Bathroom transition installations typically cost $150-$300, with waterproofing measures adding $50-$150 to project totals.
Managing Height Differences in Tile to Hardwood Transitions
Height variations between tile and hardwood represent the most common challenge in transition installation, occurring due to different material thicknesses, subfloor inconsistencies, or underlayment variations. Understanding how to address these differences prevents tripping hazards and ensures professional results.
Common Causes of Height Differences
Tile installations typically sit higher than hardwood due to mortar bed thickness, with thin-set tile applications adding 3/8 to 1/2 inch above the subfloor, while cement board or backer board adds another 1/4 to 1/2 inch. Conversely, hardwood flooring thickness ranges from 3/8 inch for engineered products to 3/4 inch for solid hardwood, often installed directly on subfloor without underlayment. This combination frequently creates situations where tile sits 1/4 to 3/4 inch higher than adjacent hardwood.
Subfloor inconsistencies from additions or remodeling contribute to height variations, especially in older homes where flooring has been changed multiple times. Some areas may have double subfloors, while others feature single-layer construction, creating irregular transition heights throughout the home. Professional flooring contractors address these variations during installation planning, sometimes grinding down high spots or building up low areas with leveling compounds to minimize transition height differences. In 2026, laser measurement technology allows installers to map floor height variations accurately, planning transitions that accommodate existing conditions while meeting code requirements.
Solutions for Significant Height Variations
When height differences exceed 3/4 inch, standard reducer strips may not provide adequate slope for safe transitions. Custom solutions include ramped threshold systems that extend the transition width to 4-6 inches, creating a gentler slope that meets ADA guidelines of maximum 1:12 ratios. These wider transitions work well in commercial applications or homes designed for accessibility.
Another approach involves adjusting subfloor heights during installation by adding plywood layers beneath the lower flooring material. This method reduces the height differential at the transition point, allowing standard transition strips to function properly. However, this solution requires planning during initial installation and becomes impractical for retrofit situations. For extreme height differences in existing homes, some installers create small steps finished with hardwood nosing or tile bullnose, essentially treating the transition as a single-riser staircase rather than attempting to ramp the entire height change.
Tile to Wood Transition in Open Floor Plans
Open floor plans dominate modern American home design in 2026, creating unique challenges for tile to wood transitions that must function as subtle design elements rather than obvious dividers. These transitions typically run for extended lengths, sometimes 10-20 feet or more, requiring careful material selection and installation precision.
The key to successful open floor plan transitions involves positioning the material change at logical architectural points, such as where a kitchen peninsula ends, under an island’s overhang, or aligned with columns or beams. This positioning makes the transition appear intentional rather than arbitrary. Many designers favor minimal transitions like slim metal profiles or even flush transitions with no raised strip, achieved by perfectly matching floor heights during installation. When visible transitions are necessary, choose materials that complement both flooring types, such as brushed metal finishes that coordinate with kitchen hardware or wood transitions that match the hardwood species.
For long transition runs in open concepts, ensure the transition strip remains straight using a chalk line or laser guide during installation. Curved transitions following irregular room shapes require flexible transition materials like vinyl or specialized flexible metal profiles that can conform to gentle curves. Professional installation of open floor plan transitions averages $12-$25 per linear foot in 2026, with costs varying by region and material selection. The investment in proper installation pays dividends in both safety and aesthetics, as poorly executed long transitions become focal points that detract from your home’s overall design.
Do You Need a Transition Strip Between Wood and Tile
While some homeowners question whether transition strips are necessary, professional flooring contractors strongly recommend them for most applications. Transition strips serve multiple critical functions beyond aesthetics, including edge protection, moisture barriers, and accommodation of material movement.
Hardwood flooring expands and contracts with seasonal humidity changes, sometimes moving as much as 1/8 inch across a 10-foot span. Without a transition strip to accommodate this movement, hardwood can push against tile edges, causing cracks, chips, or even tile displacement. The expansion gap covered by transition strips typically measures 1/4 to 3/8 inch, providing adequate space for wood movement while the transition strip conceals the gap. Additionally, exposed tile edges are vulnerable to chipping from impacts, foot traffic, and furniture movement. Transition strips protect these edges, significantly extending tile installation lifespan.
Limited situations exist where you might eliminate transition strips, primarily when achieving perfectly flush floor heights using compatible materials and the transition occurs in extremely low-traffic areas. Some high-end installations use grout lines as transitions, with grout color-matched to tile continuing between materials without raised strips. However, this approach requires expert installation, perfectly matched heights, and works only with floating hardwood floors that won’t expand toward tile edges. For 95 percent of residential applications, investing in quality transition strips provides essential protection, safety features, and professional appearance that justifies their cost.
Material Selection for Transition Strips
Choosing the right transition material impacts both aesthetics and durability. Modern options include wood, metal, vinyl, and composite materials, each offering distinct advantages for specific applications.
Wood Transition Strips
Wood transitions provide seamless integration with hardwood floors when species-matched, creating the most cohesive look for traditional or transitional interiors. Premium manufacturers offer transition strips in oak, maple, hickory, walnut, and exotic species like Brazilian cherry, allowing perfect matching with your existing hardwood. Pre-finished wood transitions include factory-applied polyurethane or oil finishes that match common hardwood finishing systems, eliminating the need for on-site finishing.
However, wood transitions require more maintenance than metal alternatives, needing periodic refinishing in high-traffic areas. They also offer less moisture resistance, making them less suitable for bathroom or wet-area applications. Wood transition costs range from $8-$25 per linear foot depending on species and finish, positioning them as mid-range to premium options. In 2026, engineered wood transitions have gained popularity, offering improved dimensional stability compared to solid wood while maintaining authentic wood appearance.
Metal Transition Profiles
Metal transitions, particularly aluminum and stainless steel profiles, dominate contemporary and modern interior designs in 2026. These materials offer superior durability, moisture resistance, and require virtually no maintenance beyond occasional cleaning. Available finishes include brushed aluminum, satin nickel, oil-rubbed bronze, polished brass, and matte black, allowing coordination with door hardware, faucets, and light fixtures throughout your home.
The Schluter metal profile systems represent the premium end of metal transitions, with German-engineered designs that integrate during tile installation. Less expensive metal transitions use surface-mount installation methods, attaching with adhesive and nails after both flooring materials are in place. Metal transitions excel in moisture-prone areas, handling bathroom and kitchen applications without warping, staining, or deteriorating. Costs range from $6-$35 per linear foot, with premium finishes and profiles commanding higher prices. The long-term durability often justifies the initial investment, as quality metal transitions can last the life of your flooring.
Vinyl and Composite Options
Vinyl transition strips offer the most economical solution, typically costing $3-$8 per linear foot, while providing adequate performance for low to moderate traffic areas. Modern vinyl transitions feature realistic wood-grain patterns that coordinate with luxury vinyl plank flooring, creating cohesive transitions in homes using multiple synthetic flooring materials. These transitions work well for rental properties or budget-conscious renovations where cost containment is essential.
Composite transitions combine wood fibers with polymers, creating dimensionally stable products that resist moisture and wear better than solid wood while maintaining wood-like appearance. These materials typically cost $10-$18 per linear foot and work particularly well in basement or grade-level applications where humidity fluctuations might affect solid wood transitions. In 2026, composite technology has advanced significantly, with premium products virtually indistinguishable from solid wood while offering superior performance characteristics for demanding applications.
Professional Installation vs DIY Transition Projects
Deciding between professional installation and DIY approaches for your tile to hardwood transition depends on your skill level, tools available, and project complexity. Simple transitions in doorways with minimal height differences suit DIY installation, while complex open floor plan transitions or multiple height variations benefit from professional expertise.
Professional installers bring specialized tools including jamb saws, oscillating multi-tools, and pneumatic finish nailers that ensure precise cuts and secure fastening. They also possess experience managing common challenges like out-of-square walls, subfloor irregularities, and proper moisture barrier integration. In 2026, professional transition installation costs average $8-$15 per linear foot for labor alone, with complex installations reaching $20-$30 per linear foot. Most flooring contractors include transition installation within their overall project quotes, making professional installation cost-effective when installing both the tile and hardwood.
DIY installation becomes viable when working with track-based T-molding systems in straightforward applications. These systems require basic carpentry skills, a miter saw, drill, and hammer. Online tutorials and manufacturer installation guides provide step-by-step instructions for homeowners comfortable with home improvement projects. Budget at least 2-4 hours for your first transition installation, including time for mistakes and adjustments. Consider practicing on scrap materials before cutting expensive transition strips. Regardless of who performs installation, invest in quality materials, as transition strips are visible focal points that significantly impact your flooring’s overall appearance.
Related video about tile to hardwood transition
This video complements the article information with a practical visual demonstration.
Your questions answered
How do you transition between hardwood and tile?
Transitioning between hardwood and tile requires installing a transition strip that bridges the two materials, accommodating height differences and protecting floor edges. First, measure the height differential between surfaces. For equal heights, use T-molding that sits in a track between both floors. For height differences, use reducer strips that create a gradual slope. Install the track or strip along the transition line, ensuring both flooring materials end within 1/4 inch of the strip center. Secure with construction adhesive and finish nails, then snap the visible transition piece into place. Apply flexible caulk along edges in moisture-prone areas for additional protection.
How to transition from tile to hardwood flooring?
Transitioning from tile to hardwood flooring involves selecting the appropriate transition type based on your height difference and location. Measure the gap between tile and hardwood surfaces at multiple points. Choose T-molding for flush transitions, reducer strips for height differences up to 3/4 inch, or Schluter metal profiles for integrated tile installations. Cut both flooring materials to meet at your transition line, leaving a 1/4 to 3/8 inch expansion gap. Install the transition track or strip using adhesive and nails, ensuring it remains straight along the entire length. For kitchen or bathroom applications, seal edges with waterproof caulk to prevent moisture penetration.
How do you transition from tiles to wood?
Transitioning from tiles to wood follows similar principles as tile to hardwood transitions, using the same types of transition strips and installation methods. The process begins with accurate measurement of the height difference between materials. Install a track or reducer strip along the transition line, securing it to the subfloor with construction adhesive and finish nails spaced 16 inches apart. Both tile and wood should end close to the transition strip, with the strip covering the gap when installed. Pre-drill nail holes to prevent splitting, especially with hardwood transitions. Select a transition material that complements both flooring types, such as matching wood species or coordinating metal finishes.
Do I need a transition strip between wood and tile?
Yes, transition strips are strongly recommended between wood and tile in nearly all applications. Transition strips serve essential functions including protecting vulnerable tile edges from chipping, concealing expansion gaps required for wood movement, preventing moisture migration between rooms, and eliminating tripping hazards from height differences. Hardwood expands and contracts with humidity changes, potentially pushing against tile and causing damage without proper spacing. While some high-end installations with perfectly flush floors occasionally eliminate transition strips, 95 percent of residential applications benefit from quality transitions that enhance safety, durability, and appearance. The investment of $8-$20 per linear foot for transition materials and installation provides crucial protection justifying the cost.
What is the best transition for tile to hardwood with height difference?
Reducer transition strips provide the best solution for tile to hardwood transitions with height differences. These strips feature a gradual slope from the taller surface to the lower one, accommodating height variations from 1/4 inch to 3/4 inch safely. For differences under 1/4 inch, T-molding with slight beveling works adequately. Height differences exceeding 3/4 inch require wider ramp-style transitions spanning 4-6 inches to create gentler slopes meeting safety standards. Material choice depends on your design aesthetic and location, with wood reducers offering seamless integration in traditional homes, while metal reducers provide durability for high-traffic or moisture-prone areas. Schluter RENO-RAMP profiles excel for tile installations, integrating during tile setting for permanent, professional results.
How much does it cost to install tile to hardwood transition?
Tile to hardwood transition installation costs range from $150-$400 for typical doorway applications in 2026, including materials and professional labor. Material costs vary by type, with basic vinyl transitions starting at $3-$8 per linear foot, wood transitions costing $8-$25 per linear foot, and premium metal profiles like Schluter systems reaching $15-$35 per linear foot. Professional installation labor adds $8-$15 per linear foot for straightforward applications, increasing to $20-$30 per linear foot for complex installations with significant height differences or waterproofing requirements. Open floor plan transitions spanning 10-20 feet typically cost $300-$600 installed. DIY installation reduces costs to materials only but requires proper tools and moderate carpentry skills for professional-looking results.
| Transition Type | Best Application | Cost Range (2026) |
|---|---|---|
| T-Molding | Same-height floors, open floor plans, minimal height difference under 1/8 inch | $3-$15 per linear foot |
| Reducer Strip | Height differences 1/4 to 3/4 inch, doorways, room thresholds | $8-$18 per linear foot |
| Schluter Profiles | New tile installations, modern designs, moisture-prone areas | $15-$35 per linear foot |
| Wood Transitions | Traditional homes, species-matching hardwood, low-moisture areas | $8-$25 per linear foot |
| Metal Transitions | Contemporary designs, bathrooms, kitchens, high-traffic areas | $6-$35 per linear foot |