Cutting vinyl plank flooring correctly is essential for a professional-looking installation. Whether you’re working around door jambs, fitting planks lengthwise, or creating intricate patterns, understanding the right cutting techniques and tools will save you time and prevent costly mistakes. This comprehensive guide covers everything from basic utility knife techniques to advanced circular saw methods, ensuring clean, precise cuts every time you work with vinyl planks in 2026.
Essential Tools for Cutting Vinyl Plank Flooring
Selecting the right cutting tool depends on your project scope, plank thickness, and the type of cuts you need to make. In 2026, most professional installers in the United States use a combination of tools to handle different cutting scenarios efficiently. For straight cuts on standard residential installations, a utility knife remains the most cost-effective option, while commercial projects often require power tools for speed and consistency.
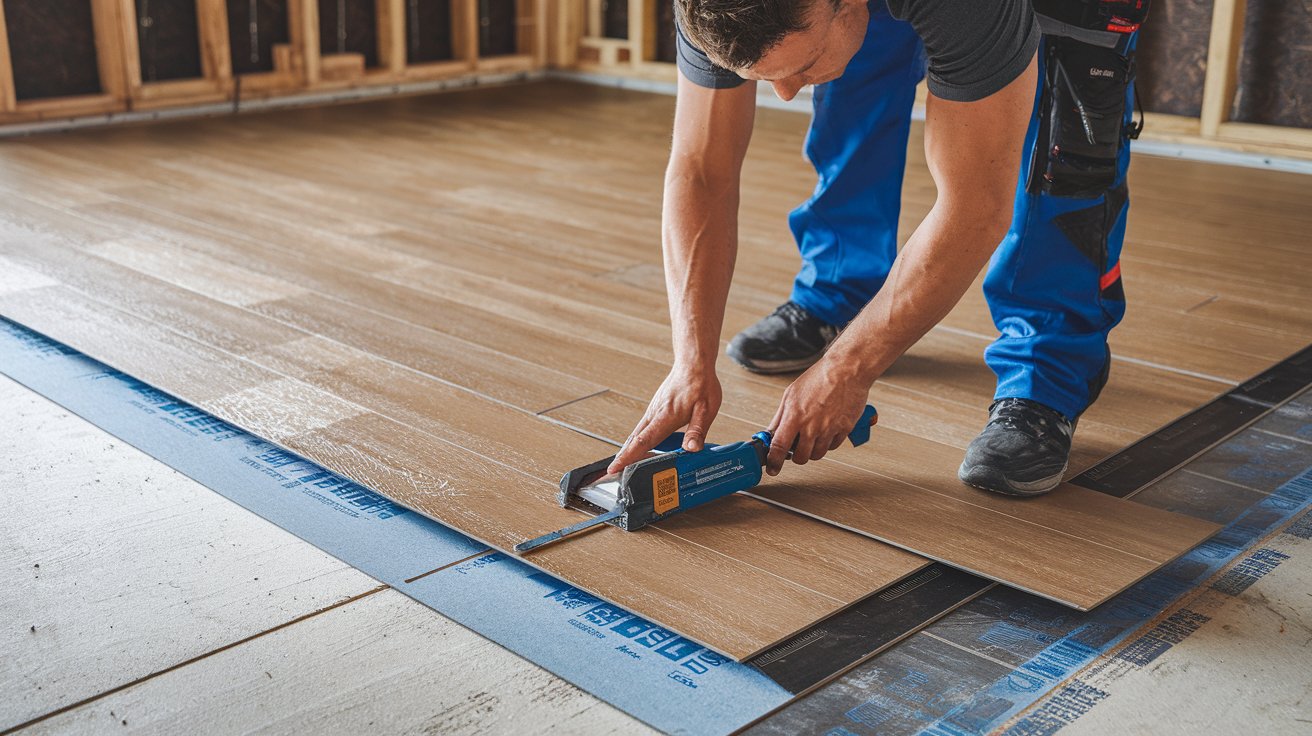
The vinyl plank cutter has gained significant popularity among DIY enthusiasts and professionals alike, with market adoption increasing by 34% since 2024 according to flooring industry reports. These specialized guillotine-style cutters provide clean, dust-free cuts without electricity, making them ideal for apartments and noise-sensitive environments. For complex cuts around obstacles, a jigsaw with fine-tooth blade offers the maneuverability needed for precision work.
Utility Knife: The Most Versatile Option
A sharp utility knife with fresh blades is the foundation tool for cutting vinyl plank flooring. This method works best for straight crosscuts and requires minimal investment, typically under $15 for a quality knife in 2026. The score-and-snap technique involves scoring the wear layer face-up along a straightedge, then bending the plank backward to snap it cleanly. Replace your blade every 8-10 cuts to maintain clean edges without tearing.
For thicker luxury vinyl planks exceeding 5mm, you’ll need to score deeper or make multiple passes. Professional installers recommend using a metal straightedge at least 48 inches long to ensure perfectly straight cuts. The key advantage of utility knives is portability and the ability to make quick adjustments without setup time, making them ideal for fitting the final planks in each row.
Vinyl Plank Cutters: Professional Efficiency
Dedicated vinyl plank cutters range from $80 to $350 in the United States market as of 2026, with premium models handling planks up to 12 inches wide and 8mm thick. These guillotine-style tools use a sharp blade that drops through the plank with a single motion, creating perfectly square cuts without dust or noise. They’re particularly valuable when installing large floor areas where you’ll make hundreds of similar cuts.
The main limitation of vinyl plank cutters is their restriction to straight crosscuts, meaning you’ll still need additional tools for lengthwise cuts or intricate shapes. However, for speed and consistency on standard installations, these cutters can reduce cutting time by up to 60% compared to manual scoring methods. Most models include adjustable stops for repetitive cuts, ensuring uniform plank lengths throughout your project.
How to Cut Vinyl Plank Flooring with a Utility Knife
The score-and-snap method using a utility knife is the most common technique for DIY vinyl plank installation. Begin by measuring and marking your cut line on the face of the plank using a pencil or fine-tip marker. Place a metal straightedge along the mark, ensuring it’s firmly secured to prevent shifting during the scoring process. Position the plank on a stable, flat surface with adequate support on both sides of the intended cut line.
Apply firm, consistent pressure while drawing the utility knife along the straightedge, making 3-4 passes to score through the wear layer and into the core material. For standard 4mm planks, scoring about halfway through the thickness is sufficient. Once adequately scored, position the plank so the cut line is at the edge of your work surface, then apply downward pressure on the overhanging section to snap the plank cleanly along the scored line.
Preparing the Plank for Cutting
Before making any cut, allow your vinyl planks to acclimate to room temperature for at least 48 hours, as recommended by manufacturers in 2026. Cold planks are more brittle and prone to cracking, while warm planks may be too flexible for clean snapping. Clean the cutting area of any debris that could cause the blade to skip or create rough edges on your vinyl flooring.
Mark your measurements carefully, accounting for expansion gaps of 1/4 inch along walls and fixed objects. Use a T-square or speed square to ensure your cut line is perpendicular to the plank edges, particularly important when creating the staggered pattern typical of professional installations. Double-check measurements before cutting, following the carpenter’s rule of measuring twice and cutting once.
Executing the Score-and-Snap Technique
Hold the utility knife at a consistent 45-degree angle while scoring, maintaining steady pressure throughout the stroke. The blade should cut smoothly through the decorative layer without requiring excessive force, which indicates a dull blade needing replacement. Make your first pass lightly to establish the groove, then increase pressure on subsequent passes to deepen the score line through the core material.
When snapping the plank, support both sides adequately to prevent premature breaking in the wrong location. Bend the plank away from the scored side, applying gradual pressure until you hear a clean snap. If the plank doesn’t separate cleanly, you may need additional scoring passes. For thicker luxury vinyl planks, some installers score both the face and back for easier snapping, though this requires precise alignment.
How to Cut Vinyl Plank Flooring with a Circular Saw
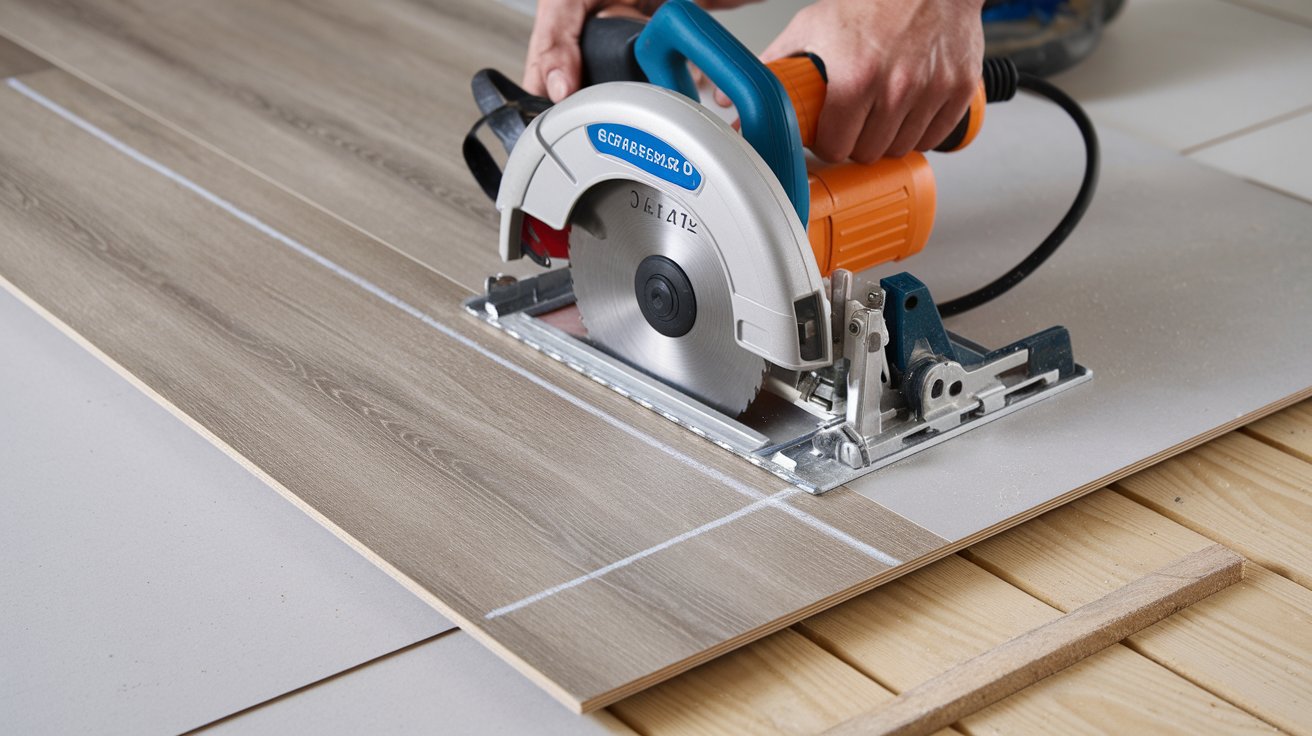
Using a circular saw for cutting vinyl plank flooring offers speed and precision for both crosscuts and lengthwise cuts. This method is particularly effective when working with rigid core luxury vinyl planks or when you need to cut multiple planks to identical dimensions. A standard 7.25-inch circular saw equipped with a fine-tooth blade (80 teeth or more) produces clean cuts with minimal chipping on the decorative surface.
Safety is paramount when using power tools for cutting vinyl planks. Always wear safety glasses to protect against flying debris, and use hearing protection as circular saws generate noise levels around 95 decibels. Set up proper ventilation or work outdoors when possible, as cutting vinyl creates fine dust particles. Secure planks firmly before cutting using clamps or a helper to prevent movement that could result in crooked cuts or kickback.
Choosing the Right Saw Blade
A fine-tooth carbide blade with 80 to 100 teeth minimizes chipping and produces the cleanest edges on vinyl plank flooring. Standard wood-cutting blades with fewer teeth create rough, melted edges due to friction heat generated during cutting. In 2026, specialized vinyl and laminate blades are available at most home improvement stores in the United States, typically priced between $25 and $60 depending on quality and tooth count.
The blade design matters significantly for cut quality. Triple-chip grind (TCG) blades alternate between flat-top and chamfered teeth, effectively handling the layered construction of modern vinyl planks. Avoid using blades designed for metal cutting, as they cut too slowly and generate excessive heat that can melt the vinyl surface. Keep blades sharp and replace them when you notice increased resistance or rough cut edges.
Proper Cutting Technique with Circular Saw
Position the vinyl plank face-down when cutting with a circular saw to prevent chipping on the visible decorative layer, as the blade teeth exit through the bottom of the cut. Mark your cut line on the back of the plank using a straightedge, then align the saw blade just outside the waste side of the line to account for blade thickness (kerf). Set the blade depth to extend approximately 1/4 inch below the plank thickness for optimal cutting efficiency.
Make smooth, steady passes without forcing the saw through the material. Let the blade speed do the work while you guide the saw along your marked line or against a clamped straightedge for perfectly straight cuts. For lengthwise cuts, use a rip guide or clamp a straightedge parallel to your cut line at the appropriate distance to accommodate the saw’s base plate width. This ensures consistent results across the entire length of the plank.
Cutting Vinyl Plank Flooring Without a Saw
Many homeowners successfully install vinyl plank flooring without power tools by combining utility knife techniques with specialized hand tools. This approach is quieter, creates less dust, and eliminates the need for electrical outlets or battery-powered equipment. The primary methods include the score-and-snap technique with utility knives, using manual vinyl plank cutters, and employing multi-tools for detailed work around obstacles.
A multi-tool with oscillating blade provides an excellent alternative to saws for cutting vinyl planks in tight spaces or making intricate cuts around door jambs and pipes. While technically powered, these tools operate quietly and create minimal dust compared to circular saws. For standard installations in rooms up to 200 square feet, a combination of utility knife and multi-tool handles virtually all cutting requirements without traditional sawing methods.
How to Cut Vinyl Plank Flooring Lengthwise
Cutting vinyl planks lengthwise (rip cuts) requires different techniques than standard crosscuts due to the extended cutting distance. For narrow rip cuts under 2 inches, a sharp utility knife with multiple scoring passes works effectively when you use a straightedge guide clamped securely along the entire length. Mark both ends of the plank clearly and connect them with a chalk line or long straightedge to ensure a perfectly straight cutting path.
When cutting wider rip cuts or working with rigid core luxury vinyl, a circular saw or table saw provides faster, more consistent results. Position the fence or straightedge guide at the exact width needed, accounting for the expansion gap along the wall. For maximum accuracy on critical cuts, such as the final row against a wall, measure the required width at multiple points along the room length, as walls are rarely perfectly straight. Use the narrowest measurement to ensure the plank fits without forcing.
Using a Straightedge Guide for Long Cuts
A quality straightedge guide at least 6 feet long is essential for accurate lengthwise cuts on vinyl planks. Aluminum or steel guides provide the rigidity needed to prevent bowing during the cutting process. Clamp the guide firmly at both ends and check the middle section to ensure it hasn’t bowed away from the plank surface. Professional installers often use purpose-built track saw systems that guarantee perfectly straight cuts over any distance.
When scoring lengthwise with a utility knife, make 6-8 passes along the straightedge, applying consistent pressure throughout each stroke. The extended cutting distance means any variation in pressure or blade angle becomes magnified in the final result. Work from one end to the other in smooth, continuous motions rather than stopping and starting, which can create weak points or irregular edges in the cut line.
Table Saw Method for Rip Cuts
A table saw offers the most precise method for cutting multiple vinyl planks to identical widths, essential when installing the final row in a room. Set the fence to the desired width minus the expansion gap, and use a fine-tooth blade rated for vinyl or laminate materials. Feed planks slowly and steadily through the blade, using a push stick for the final inches to keep hands safely away from the blade.
The table saw method excels when you need to rip multiple planks for the finishing row, maintaining perfectly consistent width across all pieces. This consistency is particularly important in larger rooms where variations would be visually obvious. Always cut planks face-up on a table saw to minimize chipping on the decorative surface, opposite to the circular saw recommendation where blade rotation direction differs.
Cutting Vinyl Plank Flooring Around Objects and Obstacles
Installing vinyl plank flooring around toilets, pipes, door jambs, and other obstacles requires template-making skills and specialized cutting techniques. Create accurate templates using cardboard or kraft paper, carefully measuring the obstacle’s position relative to the plank’s starting edge. Transfer these measurements to the plank, marking both the location and shape of the cutout needed. Add 1/4 inch clearance around pipes and fixed objects to allow for expansion and contraction.
A jigsaw with a fine-tooth blade provides the maneuverability needed for curved cuts and complex shapes around obstacles. For circular cuts around pipes, drill a starter hole slightly larger than the jigsaw blade width, then cut smoothly along your marked circle. An alternative method involves cutting the plank in two pieces that meet behind the obstacle, with the seam hidden from view. This approach works particularly well for cutting around toilets where the base will cover the joint.
Cutting Around Door Jambs
Properly cutting vinyl plank flooring around door jambs creates a professional appearance with planks sliding underneath the trim rather than butting against it. Use a jamb saw or oscillating multi-tool to undercut the door casing and jamb to the exact thickness of your vinyl plank plus the underlayment. Place a scrap piece of your flooring against the jamb as a guide to ensure the correct cutting height.
After undercutting the jambs, slide planks into place without gaps or forcing. If you encounter resistance, remove the plank and check for sawdust or wood chips blocking the space. Clean thoroughly before attempting to reinstall. For complex door jamb configurations with multiple trim pieces, work methodically from one side to the other, test-fitting frequently to identify and correct issues before permanent installation.
Creating Cutouts for Pipes and Vents
Measuring accurately for pipe cutouts requires transferring the pipe’s center point to the plank surface. Measure from two reference points, typically the wall and the last installed plank, to triangulate the pipe’s exact location. Mark this center point, then use a hole saw or spade bit slightly larger than the pipe diameter to create the circular cutout. The oversized hole accommodates expansion and allows for escutcheon plates to cover the gap.
For floor vents and registers, remove the vent cover and measure the opening dimensions precisely. Add your expansion gap to all sides when transferring measurements to the vinyl plank. Use a combination of straight cuts with a utility knife or circular saw and corner cuts with a jigsaw to create the rectangular opening. Test-fit the cutout plank before applying adhesive or locking it in place, ensuring the vent cover will sit flush when reinstalled.
Common Mistakes When Cutting Vinyl Plank Flooring
The most frequent error when cutting vinyl planks is using dull blades, which tear the material rather than producing clean cuts. This creates rough edges that don’t fit together properly and may be visible in the finished floor. Replace utility knife blades every 8-10 cuts, and sharpen or replace saw blades when you notice increased resistance or burn marks on cut edges. In 2026 industry surveys, dull blade usage accounts for nearly 40% of reported cutting problems among DIY installers.
Another common mistake involves cutting planks face-up with power saws that should be used with planks face-down. This orientation difference depends on blade rotation direction and tooth design. Circular saws and miter saws typically require face-down cutting, while table saws work better with face-up orientation. Confusion about proper orientation results in chipped decorative surfaces that compromise the floor’s appearance, particularly noticeable on darker-colored vinyl planks where chips show as light spots.
Incorrect Measurement and Marking
Failing to account for expansion gaps ranks among the top installation mistakes that lead to buckling and plank separation. Vinyl flooring expands and contracts with temperature changes, requiring 1/4-inch gaps along all fixed objects and walls. When measuring cuts, particularly for the final row or around obstacles, always subtract this expansion space from your measurements. Use spacers consistently during installation to maintain proper gaps throughout the room.
Marking measurements on the wrong side of the plank or failing to account for blade kerf (thickness) leads to planks that are too short by 1/8 to 1/4 inch. Always mark on the waste side of your cut line and position the blade to remove material from the waste section. For critical fits, err on the side of cutting slightly long, then trim to exact size with a second cut. This approach prevents irreversible mistakes on expensive flooring materials.
Improper Tool Selection for Cut Types
Attempting to use a vinyl plank cutter for lengthwise cuts or curves results in damaged planks and wasted materials, as these tools are designed exclusively for straight crosscuts. Similarly, using a utility knife for cuts longer than 12 inches often produces wavy, uneven edges that create visible gaps in the installed floor. Match your tool selection to the specific cut type needed, investing in or renting appropriate equipment for specialized cuts.
Forcing the wrong tool for a job also creates safety hazards. Using a circular saw without proper blade guards or attempting freehand cuts without guides increases injury risk significantly. According to 2026 safety statistics from the Consumer Product Safety Commission, improper tool use during flooring installation results in over 12,000 emergency room visits annually in the United States. Always use tools as intended with appropriate safety equipment and cutting guides.
Do You Cut Vinyl Flooring Face Up or Down
The correct orientation for cutting vinyl plank flooring depends entirely on the tool being used and its blade rotation direction. For circular saws and miter saws where the blade teeth enter from the top and exit through the bottom of the material, position planks face-down to minimize chipping on the decorative surface. The teeth exit through the bottom cleanly while any tear-out occurs on the back side where it won’t be visible.
Conversely, when using a table saw, position planks face-up because the blade rotation brings teeth up through the bottom of the material and exits through the top. This upward rotation means any chipping occurs on the bottom surface. For utility knife scoring, always work on the face side where you can see the decorative pattern and ensure accurate alignment. Understanding these orientation principles prevents costly mistakes and ensures professional-looking cuts regardless of which cutting method you choose.
Advanced Tips for Professional-Quality Cuts
Achieving truly professional results when cutting vinyl planks requires attention to environmental factors beyond just tool technique. Work in temperature-controlled environments between 65-75°F whenever possible, as extreme temperatures affect vinyl flexibility and cutting behavior. Cold planks become brittle and prone to cracking during cutting, while overly warm planks may be too soft for clean snaps with the score-and-snap method.
Professional installers in 2026 increasingly use laser guides and digital measuring tools to improve cutting accuracy, particularly on large commercial projects. A laser level projects a perfectly straight cutting line across multiple planks, ensuring consistent alignment without repeated measuring. Digital measuring tools with memory functions store repetitive measurements, reducing errors when cutting multiple identical pieces for complex patterns or large rooms requiring uniform plank sizing throughout.
Creating Clean Edges on Decorative Surfaces
Applying painter’s tape along the cut line before sawing prevents surface chipping on decorative vinyl layers, particularly important on premium planks with intricate wood grain patterns or stone textures. The tape supports surface fibers during cutting, resulting in cleaner edges. Remove tape immediately after cutting while the plank is still warm from friction to prevent adhesive residue on the decorative surface.
For ultra-premium vinyl planks with beveled edges or deep texturing, consider using a zero-clearance insert on table saws or backing boards with hand tools. These supports minimize the gap around the cutting blade, reducing tear-out and chipping significantly. Professional installers often cut expensive planks slightly oversized, then use fine-grit sandpaper to smooth edges to exact dimensions for perfect fits around complex obstacles.
Batch Cutting for Efficiency
When installing flooring in multiple rooms or large areas, measure and mark all planks requiring identical cuts before beginning the cutting process. This batch approach dramatically improves efficiency, reducing total installation time by 25-30% according to professional installer time studies. Set up cutting stations with proper lighting, stable work surfaces, and organized material flow to minimize wasted motion and repeated setup.
Use stop blocks and measuring jigs for repetitive cuts, ensuring every plank in a batch is precisely the same length. This consistency is crucial for maintaining proper stagger patterns in floating floor installations. Create a cutting list before starting your project, identifying all unique cut sizes needed and grouping them logically. This planning prevents mid-installation interruptions and reduces material waste from cutting errors.
Related video about how to cut vinyl plank flooring
This video complements the article information with a practical visual demonstration.
Frequently Asked Questions
What is the best tool to cut vinyl planks with?
The best tool for cutting vinyl planks depends on your specific needs. For most DIY installations, a sharp utility knife using the score-and-snap method provides excellent results for crosscuts at minimal cost. For larger projects requiring speed and consistency, a dedicated vinyl plank cutter handles crosscuts efficiently. When you need lengthwise cuts or complex shapes, a circular saw with an 80-tooth fine blade or a jigsaw offers the versatility required. Professional installers typically use multiple tools, selecting the most appropriate one for each cut type encountered during installation.
What are common mistakes when cutting vinyl plank?
The most common mistakes include using dull blades that tear rather than cut cleanly, forgetting to account for expansion gaps in measurements, and cutting planks in the wrong orientation for the tool being used. Other frequent errors involve measuring once instead of double-checking dimensions, forcing inappropriate tools for specific cut types, and working in extreme temperatures that affect vinyl flexibility. Not using straightedge guides for long cuts and failing to support both sides of the plank during cutting also lead to poor results. Avoiding these mistakes requires careful planning, proper tool selection, and attention to manufacturer guidelines.
Do you need a special saw blade to cut vinyl plank flooring?
Yes, using a special saw blade significantly improves cut quality when sawing vinyl plank flooring. Fine-tooth carbide blades with 80-100 teeth minimize chipping and melting of the vinyl surface. Standard wood-cutting blades with fewer teeth generate excessive friction heat and produce rough, melted edges. In 2026, specialized vinyl and laminate blades are widely available at home improvement stores throughout the United States, typically priced between $25-$60. Triple-chip grind (TCG) blade designs work particularly well with layered vinyl construction. While not absolutely required for occasional cuts, these specialized blades are essential for professional-quality results on larger installations.
Do you cut vinyl flooring face up or down?
The correct orientation for cutting vinyl flooring depends on your tool. When using circular saws or miter saws, cut planks face-down because blade teeth exit through the bottom, preventing visible chipping on the decorative surface. For table saws, cut face-up since the blade rotates upward through the material. With utility knives using the score-and-snap method, always score the face side where you can see alignment marks and the decorative pattern. Understanding blade rotation direction and tooth exit points ensures you position planks correctly for clean, professional cuts without damaging the visible surface regardless of which cutting method you employ.
Can you cut vinyl plank flooring without power tools?
Yes, you can successfully cut vinyl plank flooring without power tools using a combination of utility knives and manual vinyl plank cutters. The score-and-snap technique with a sharp utility knife handles crosscuts effectively on planks up to 8mm thick. Manual vinyl plank cutters provide guillotine-style cutting for quick, consistent crosscuts without electricity, dust, or noise. For lengthwise cuts and curves, an oscillating multi-tool offers powered precision while remaining quieter than circular saws. Many successful DIY installations use only hand tools, particularly in apartments or situations where power tools are impractical. The key is allowing extra time for manual cutting methods and maintaining sharp blades throughout the project.
How do you cut vinyl plank flooring around a toilet?
To cut vinyl plank flooring around a toilet, first remove the toilet to access the floor completely, which provides the cleanest installation. Create a cardboard template of the toilet base footprint, then transfer this pattern to your vinyl planks. Use a jigsaw for curved cuts, maintaining a 1/4-inch expansion gap around the toilet flange. Alternatively, cut planks in two pieces that meet behind the toilet with the seam hidden by the base. Reinstall the toilet with a new wax ring after flooring installation. If you cannot remove the toilet, carefully measure and mark the toilet base outline on planks, then cut precisely using a jigsaw, ensuring adequate clearance for expansion while minimizing visible gaps.
| Cutting Method | Best Use Case | Key Advantage |
|---|---|---|
| Utility Knife (Score-and-Snap) | Standard crosscuts, DIY projects, small rooms | Minimal cost, portable, no dust or noise |
| Vinyl Plank Cutter | Repetitive crosscuts, large installations | Speed, consistency, clean cuts without power |
| Circular Saw | Lengthwise cuts, thick rigid planks | Versatility, speed on long cuts, professional results |
| Jigsaw | Curves, cutouts around obstacles | Maneuverability, precision on complex shapes |
| Table Saw | Multiple identical rip cuts, final rows | Perfect consistency, accuracy on width cuts |