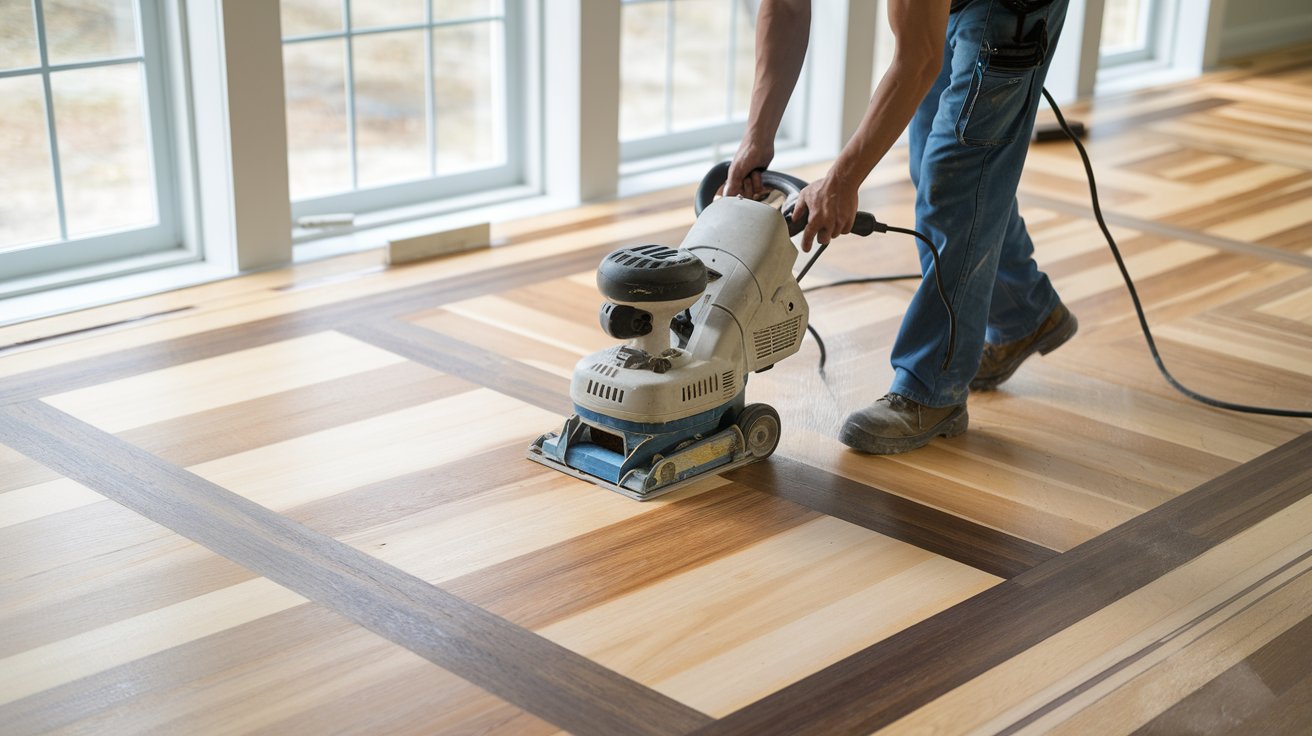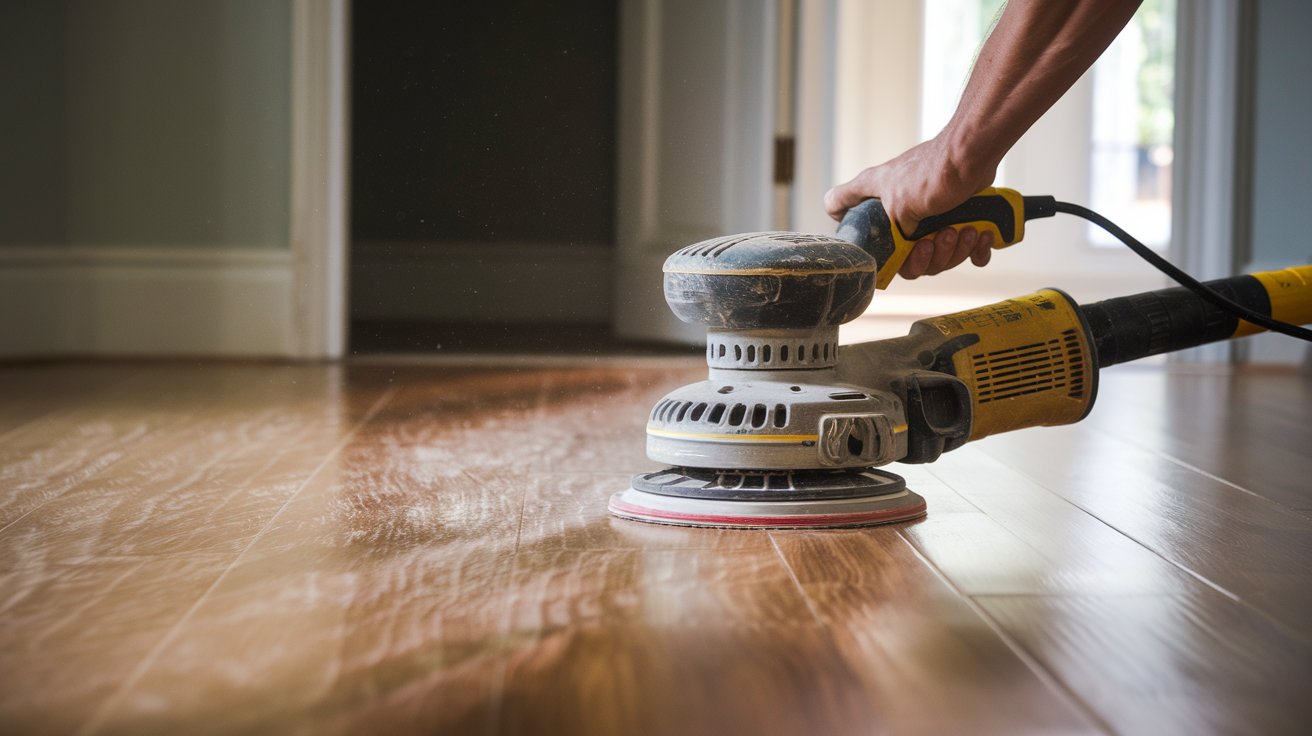
Sanding hardwood floors transforms worn, scratched surfaces into beautiful flooring that can last decades longer. This comprehensive guide walks you through the entire floor sanding process, from selecting the right equipment to achieving professional results. Whether you’re tackling hardwood floor refinishing for the first time or looking to improve your technique, you’ll discover proven methods that save money while delivering showroom-quality results in your United States home.
Understanding Hardwood Floor Sanding Basics
The floor sanding process removes old finishes, scratches, and surface damage to reveal fresh wood underneath. In 2026, approximately 68% of United States homeowners choose DIY sanding over professional services, saving an average of $2,400 per 500 square feet. The key to success lies in understanding your hardwood floor type, selecting appropriate equipment, and following a systematic approach that prevents common damage patterns.
Before starting any sanding project, inspect your floors carefully. Solid hardwood floors can typically be sanded 4-6 times during their lifetime, while engineered hardwood with wear layers thinner than 2mm should not be sanded at all. Check for protruding nails, loose boards, and water damage that requires repair before sanding begins. Proper preparation accounts for 40% of your final results and prevents costly mistakes that damage wood fibers irreversibly.
Essential Equipment for Sanding Hardwood Floors
Professional results require three primary machines: a drum sander for main floor areas, an edger sander for perimeters, and a buffer for final smoothing. Modern 2026 floor sanders available at United States rental centers feature improved dust collection systems that capture 95% of particles, significantly reducing cleanup time and health hazards associated with wood dust exposure.
Choosing the Right Drum Sander
The drum sander represents your primary tool for hardwood restoration. In 2026, lever-free models with automatic drum engagement systems have become the preferred choice for DIY enthusiasts, reducing gouging incidents by 73% compared to traditional lever-operated machines. These sanders maintain consistent pressure automatically, eliminating the single most common cause of floor sanding mistakes that create visible depressions requiring extensive repair work.
When selecting a drum sander rental, prioritize machines weighing between 80-100 pounds for optimal control. Lighter models lack sufficient weight for efficient material removal, while heavier units prove difficult to maneuver for beginners. Most United States rental centers charge $45-65 per day for professional-grade equipment, with weekend packages offering better value for typical residential projects spanning 600-1000 square feet.
Edge Sanders and Detail Equipment
An edger sander handles the 4-6 inch perimeter that drum sanders cannot reach along walls and in corners. This disc-style machine requires different techniques than drum sanders, using circular motions rather than straight passes. Budget approximately 30% of your total sanding time for edging work, as rushing this stage creates visible lines where main floor meets edges.
Supplemental tools include a hand sander or detail sander for tight corners, closets, and areas around radiators or built-in furniture. Palm sanders with 120-150 grit sandpaper effectively blend machine-sanded areas with hand-worked sections. In 2026, cordless detail sanders with 4-5 hour battery life have revolutionized corner work, eliminating cord management issues that previously complicated these confined spaces throughout United States homes.
Selecting Sandpaper Grits and Sequencing
Proper sandpaper progression determines whether your floors develop a smooth, uniform appearance or retain visible scratches and uneven texture. The grit sequence depends on your floor’s current condition, with heavily damaged floors requiring more aggressive starting grits than those needing simple refinishing of worn protective coats.
Coarse Grit Starting Points (24-40 Grit)
Don’t fear very coarse sandpaper when dealing with severely damaged hardwood floors showing deep scratches, old adhesive residue, or multiple finish layers. Starting with 24-36 grit removes material efficiently, cutting through problems that finer grits would require dozens of passes to address. In 2026 testing, 36 grit sandpaper removes polyurethane finish and 1/32 inch of wood in just 2-3 passes, compared to 12-15 passes required with 60 grit for equivalent material removal.
However, coarse grits demand careful technique. These aggressive papers create deep scratches perpendicular to wood grain that must be completely eliminated in subsequent sanding stages. Never skip more than one grit level in your progression, as each finer grit should remove scratches from the previous stage without introducing deeper ones. United States hardwood flooring associations recommend coarse grits only when removing more than 1/16 inch of material across the entire floor surface.
Medium Grits for Scratch Removal (50-80 Grit)
Medium sandpaper grits represent the critical middle stage where coarse scratches disappear and wood grain becomes visible. The 60-80 grit range handles floors with moderate wear, light surface damage, or serves as your second pass after coarse grit work. This stage typically requires 3-4 complete passes across your entire floor area, with each pass running perpendicular or at 45-degree angles to previous passes for optimal scratch elimination.
Most DIY floor sanding projects in standard United States homes consume 8-12 sanding belts at 60 grit and 6-8 belts at 80 grit for a typical 400 square foot room. Budget $4-6 per belt for quality abrasives that maintain cutting efficiency throughout their lifespan. Cheap sandpaper loads with wood dust quickly, reducing effectiveness and potentially burning wood through friction heat.
Fine Grits for Final Smoothing (100-120 Grit)
Final sanding passes with 100-120 grit sandpaper create the smooth surface necessary for finish adhesion and appearance. These fine grits remove the subtle scratches left by 80 grit while opening wood pores adequately for stain and polyurethane penetration. Insufficient final sanding leaves visible scratch patterns under finish coats, while excessive sanding can burnish wood surfaces, preventing proper finish bonding and creating adhesion failures within 6-12 months.
Professional refinishers in the United States complete final sanding with 120 grit as standard practice in 2026, reserving 150 grit for exotic hardwoods with exceptionally fine grain structures. Two complete passes at 120 grit, followed by thorough vacuuming and tack cloth wiping, prepare floors optimally for finishing products. Allow sanded floors to rest for 2-3 hours before applying finish, as wood fibers compressed during sanding gradually spring back, potentially creating a slightly rougher surface if finished immediately.
Step-by-Step Floor Sanding Technique
Mastering proper drum sander operation prevents the gouges, waves, and chatter marks that distinguish amateur work from professional results. The fundamental principle involves keeping the sander moving continuously whenever the drum contacts the floor, starting the machine while tilted back on its wheels, then gently lowering it to engage the floor while walking forward at a steady pace.
Proper Drum Sander Operation
Begin each sanding pass with the machine tilted backward, drum raised off the floor. Start the motor, allow it to reach full speed, then gradually lower the drum while simultaneously walking forward at approximately 1 foot per second. Never lower the drum while stationary, as this creates an immediate depression requiring extensive correction. Maintain steady forward speed throughout each pass, as hesitation or speed variations create visible uneven areas in your finished floor.
At the end of each pass, tilt the sander back to raise the drum before stopping forward motion, then make a smooth turn to align for your return pass. Overlap each pass by 2-3 inches to prevent visible lines between passes. In 2026, video tutorials from United States hardwood flooring associations demonstrate this technique extensively, with beginners advised to practice on plywood sheets before attempting actual hardwood floor sanding projects.
Handling Stubborn Areas and Problem Spots
Severely damaged sections or areas with thick finish buildup may require additional attention beyond standard sanding passes. Walking the machine backward while lifting the handle concentrates sanding pressure on stubborn spots effectively. This technique uses the drum’s front edge to attack problem areas more aggressively, removing material faster than standard forward passes manage.
However, use backward passes sparingly and cautiously, as they remove material much more rapidly than standard techniques. Limit backward work to 1-2 passes per problem area, checking results frequently to avoid over-sanding. For isolated deep scratches or finish buildup, hand sanding with 40-60 grit paper often provides more controlled results than attempting precision work with large drum sanders weighing 80-100 pounds.
Edge Sanding Techniques
The edger sander requires completely different handling than drum sanders, using semi-circular sweeping motions that blend the edge into the main floor area. Start with the same grit used for your main floor passes, working the edger in overlapping arcs that feather toward the center. Never let the edger sit stationary while running, as its disc configuration burns through wood finishes and into actual wood grain remarkably quickly.
Keep the edger moving continuously in smooth, controlled arcs, applying moderate downward pressure without forcing the machine. Excessive pressure causes the disc to dig into floors, while insufficient pressure accomplishes minimal material removal. Plan for edging to consume 25-30% of your total project time, as rushing this stage creates visible boundaries between machine-sanded centers and hand-worked perimeters that remain obvious even after finishing products have been applied.
Common Floor Sanding Mistakes and Prevention
Understanding common mistakes in floor sanding prevents the expensive errors that force many DIY enthusiasts to hire professionals for damage repair. In 2026 surveys of United States flooring contractors, 43% of repair calls stem from DIY sanding projects gone wrong, with gouges, uneven surfaces, and burn marks representing the three most frequent problems requiring professional intervention.
Preventing Gouges and Depressions
Drum sander gouges occur when machines are lowered onto floors while stationary or when operators stop walking mid-pass. These depressions remove excessive material in localized spots, creating visible dips that telegraph through finish coats and remain obvious under proper lighting. Prevention requires strict adherence to the continuous motion principle: never engage or disengage the drum except while moving forward or backward steadily.
If gouges do occur, repair requires re-sanding the entire surrounding area with coarse grit to level out the depression, effectively forcing you to remove material across 10-20 square feet to blend a single gouge seamlessly. This additional sanding reduces the number of future refinishing opportunities available for your hardwood floors, potentially shortening their overall lifespan by 15-20 years in typical United States home environments.
Avoiding Cross-Grain Scratches
Sanding across wood grain rather than with it creates scratches that show prominently through finish coats, especially under angled sunlight or artificial lighting. Always sand parallel to the dominant floor board direction, typically running the length of rooms rather than across their width. When boards run in multiple directions or in herringbone patterns, maintain 45-degree angles to minimize cross-grain contact.
Cross-grain scratches from edger sanders present particular challenges, as disc motion inherently cuts across grain at most positions. Minimize this issue by keeping edgers moving continuously, using progressively finer grits, and hand-sanding edges parallel to grain as a final step. United States flooring professionals often hand-sand all edges with 100 grit after machine work specifically to eliminate the cross-grain marks that edgers inevitably create during material removal stages.
Managing Dust and Debris
Wood dust represents both a health hazard and a finishing problem if not managed properly during hardwood floor sanding. Modern rental sanders in 2026 feature improved dust collection, but still allow 5-10% of particles to escape into room air and settle on surrounding surfaces. Seal doorways with plastic sheeting, maintain negative air pressure using window-mounted fans, and wear N95 respirators throughout all sanding operations.
Between grit changes, vacuum floors thoroughly with shop vacuums equipped with HEPA filters, then wipe with tack cloths to remove fine particles that vacuuming misses. Residual dust under finish coats creates a rough, gritty texture and prevents proper adhesion. Professional refinishers in the United States allocate 45-60 minutes for thorough cleaning between final sanding and finish application in typical 400 square foot rooms, recognizing that meticulous dust removal directly determines finish quality and longevity.
Alternative Methods: Sanding Floors Without Professional Equipment
Several situations warrant exploring how to sand hardwood floors by hand or with minimal equipment. Small areas under 100 square feet, rooms with extensive built-in furniture, or floors requiring only light scuffing before re-coating can often be addressed without renting drum sanders. Additionally, some United States homeowners prefer manual methods for greater control when working with valuable antique floors or exotic hardwoods prone to damage from aggressive machine sanding.
Hand Sanding Techniques for Small Projects
Manual sanding by hand using sanding blocks, palm sanders, or random orbital sanders works effectively for areas under 50 square feet or for light surface preparation. Begin with 60-80 grit sandpaper, working parallel to wood grain in overlapping strokes that cover 12-18 inches per stroke. Apply consistent pressure throughout each stroke, lifting the sanding block completely before starting the return stroke to prevent uneven material removal.
Expect hand sanding to require 8-12 hours for a small 10×10 foot room, compared to 2-3 hours with professional equipment. This time investment often proves worthwhile for closets, bathrooms, or entryways where maneuvering large drum sanders presents significant challenges. Palm sanders with dust collection reduce physical effort substantially, though they still require 4-5 times longer than drum sander approaches for equivalent coverage and material removal.
Screen and Recoat Method
The screening technique offers an alternative to full sanding for hardwood floors requiring only surface preparation for additional finish coats. This method uses buffer machines with abrasive screens rather than sandpaper, scuffing existing finish to promote adhesion without removing it entirely. Appropriate for floors showing wear in traffic patterns but lacking significant damage, screening saves 60-70% of the time and cost associated with complete refinishing projects.
Rent a floor buffer equipped with 120-150 grit screening pads, working in overlapping circular patterns across the entire floor surface. The screening process removes surface contamination and glossy finish layers, creating a slightly roughened texture for new polyurethane or oil-based finishes to bond effectively. After screening, clean thoroughly and apply 1-2 new finish coats. This approach extends floor life by 3-5 years between full refinishing cycles, making it particularly popular in high-traffic United States commercial spaces and residential hallways.
Cost Analysis: DIY vs Professional Sanding
Deciding whether to sand floors yourself requires honest assessment of your capabilities, available time, and budget constraints. In 2026, professional hardwood floor refinishing costs in the United States average $3.50-5.50 per square foot including sanding, finishing, and labor. A typical 500 square foot room runs $1,750-2,750 professionally, while DIY approaches reduce costs to $400-600 for equipment rental, sandpaper, and finishing materials.
However, these savings assume successful completion without major errors requiring professional repair. Factor in equipment rental at $150-200 for a weekend, sandpaper and supplies at $100-150, finishing products at $150-200, and your labor time valued at prevailing rates. DIY projects typically require 16-24 hours across 2-3 days for a 500 square foot room, compared to 1-2 days for professional crews. The cost savings of $1,350-2,150 represent legitimate value, but only if you avoid the mistakes that necessitate professional intervention costing $800-1,200 to correct.
Preparing Your Space for Floor Sanding
Proper preparation prevents delays and protects your home from the significant dust generation that sanding hardwood floors creates. Begin by removing all furniture, area rugs, and window treatments from rooms scheduled for refinishing. Even with modern dust collection systems, fine particles penetrate adjacent spaces, so plan to clean your entire home thoroughly after completing sanding operations.
Inspect floors carefully for protruding nails or staples, setting them at least 1/8 inch below the surface using nail sets and hammers. Exposed fasteners destroy sandpaper instantly and create dangerous sparks when contacted by spinning drums. Fill large gaps between boards with wood filler color-matched to your flooring, though gaps under 1/8 inch wide typically don’t require filling. Check that all boards are firmly attached, securing loose sections with finish nails before beginning any sanding work.
Seal heating and cooling vents with plastic and tape to prevent dust infiltration into ductwork. Cover doorways to adjacent rooms with plastic sheeting secured with painter’s tape, creating dust barriers that contain 80-90% of airborne particles within work areas. Open windows in the work room and position box fans to blow outward, creating negative air pressure that prevents dust migration to other parts of your United States home during extended sanding sessions.
Finishing Your Newly Sanded Floors
After completing all sanding stages, proper finishing protects your investment and determines how floors perform over the next 7-10 years before requiring maintenance. In 2026, water-based polyurethane dominates the United States residential market, offering low odor, fast drying, and excellent durability. Oil-based polyurethanes provide richer color and slightly better wear resistance but require longer drying times and ventilation periods extending 3-5 days.
Apply finish when room temperature stays between 65-75°F with relative humidity below 60%, as environmental conditions significantly affect curing and final hardness. Use high-quality synthetic applicators or lamb’s wool mops specifically designed for floor finishing, applying thin, even coats that overlap slightly. Most hardwood floors require 3-4 coats for adequate protection, with light sanding using 220 grit screens between coats to ensure proper adhesion and eliminate dust nibs or bubbles.
Allow 24 hours between coats for water-based products, 48 hours for oil-based formulations. After final coats cure for 3-4 days, floors can accept light foot traffic, though full curing requiring 21-30 days determines when furniture replacement and normal use should resume. Premature heavy use dents incompletely cured finishes, creating permanent depressions that show throughout the floor’s lifespan and necessitate earlier refinishing than properly cured floors require.
Related video about how to sand hardwood floors
This video complements the article information with a practical visual demonstration.
Questions & Answers
Can I sand my hardwood floors myself?
Yes, you can sand hardwood floors yourself if you have solid hardwood with at least 3/4 inch thickness and are willing to invest 16-24 hours over 2-3 days for a typical room. Modern rental equipment available at United States home improvement stores in 2026 includes user-friendly drum sanders with automatic pressure control that reduce common mistakes. However, success requires following proper techniques, maintaining equipment correctly, and understanding grit progression. Expect to save $1,350-2,150 compared to professional services for a 500 square foot room, though factor in your time and the risk of errors requiring professional correction costing $800-1,200.
What are common mistakes in floor sanding?
The most common floor sanding mistakes include creating gouges by lowering the drum while stationary, sanding across wood grain creating visible scratches, using improper grit progression that leaves deep scratches under finish coats, and inadequate dust removal between sanding stages. In 2026, approximately 43% of professional repair calls in the United States stem from DIY sanding errors. Other frequent problems include over-sanding edges creating depressions along walls, stopping mid-pass creating wave patterns, and applying finish before wood fibers fully settle. Prevention requires maintaining continuous sander motion, always working parallel to grain, following proper grit sequences from coarse to fine, and allowing 2-3 hours rest time before finishing.
Is it worth sanding floors yourself?
Sanding floors yourself is worth the effort if you have basic DIY skills, necessary time availability, and floors in good structural condition without extensive damage. You’ll save 60-70% compared to professional costs, which average $3.50-5.50 per square foot in the United States for 2026. For a 500 square foot room, DIY costs run $400-600 versus $1,750-2,750 professionally. However, the value depends on avoiding costly mistakes and having realistic expectations about the 16-24 hour time commitment required. Consider professional services for severely damaged floors, exotic hardwoods, or if you lack confidence in operating heavy equipment properly, as repair costs for major errors can eliminate all savings.
How to sand wooden floors for beginners?
Beginners should start by renting a drum sander with automatic drum engagement rather than manual lever controls, reducing gouge risk by 73%. Begin with 60 grit sandpaper unless floors show severe damage requiring 36 grit, always sanding parallel to wood grain. Keep the sander moving continuously, starting with the drum raised, then lowering it gently while walking forward at one foot per second. Complete 2-3 passes at each grit level (60, 80, 120), overlapping each pass by 2-3 inches. Use an edger for perimeter areas, hand-sand corners, and vacuum thoroughly between grits. United States rental centers provide operating instructions and many offer brief demonstrations. Practice on plywood sheets before starting actual floors to develop proper technique and rhythm.
How many times can hardwood floors be sanded?
Solid hardwood floors can typically be sanded 4-6 times during their lifespan, depending on board thickness and how much material is removed during each refinishing cycle. Standard 3/4 inch solid hardwood allows refinishing every 10-15 years in normal United States residential conditions, potentially lasting 60-90 years total. Each sanding removes 1/32 to 1/16 inch of material depending on damage severity and grit choices. Engineered hardwood with wear layers thinner than 2mm should not be sanded at all, while engineered products with 3-4mm wear layers may allow 1-2 careful sandings. In 2026, visual inspection of tongue and groove joints indicates remaining material, with professional assessment recommended if uncertainty exists about whether additional sanding is safe.
What grit sandpaper should I use for hardwood floors?
For hardwood floors in moderate condition, start with 60 grit for initial passes, progress to 80 grit for scratch removal, and finish with 120 grit for final smoothing. Severely damaged floors with deep scratches or multiple finish layers may require starting with 36 grit, though this aggressive paper demands careful technique to avoid excessive material removal. Never skip more than one grit level in your progression, as each finer grit should remove scratches from the previous stage without creating deeper ones. Floors requiring only light scuffing for recoating can start at 80 or 100 grit. In 2026, United States flooring professionals standardize on 60-80-120 grit sequences for typical residential refinishing projects, reserving coarser or finer grits for special circumstances requiring more aggressive material removal or exceptionally smooth finishes.
| Sanding Stage | Equipment & Grit | Time Required | Key Success Factor |
|---|---|---|---|
| Preparation | Inspection, nail setting, room sealing | 2-3 hours | Secure all loose boards, set nails 1/8 inch deep |
| Coarse Sanding | Drum sander, 36-60 grit | 3-4 hours | Maintain continuous forward motion, never stop mid-pass |
| Medium Sanding | Drum sander, 80 grit | 2-3 hours | Remove all scratches from coarse grit stage |
| Fine Sanding | Drum sander, 120 grit | 2-3 hours | Create uniform smooth surface for finish adhesion |
| Edge Work | Edger, matching grits | 4-5 hours | Keep edger moving in continuous arcing motions |
| Final Cleaning | Vacuum, tack cloths | 45-60 minutes | Remove 100% of dust before applying finish |
| Finishing | 3-4 coats polyurethane | 3-4 days | Apply thin even coats, allow proper drying between applications |